
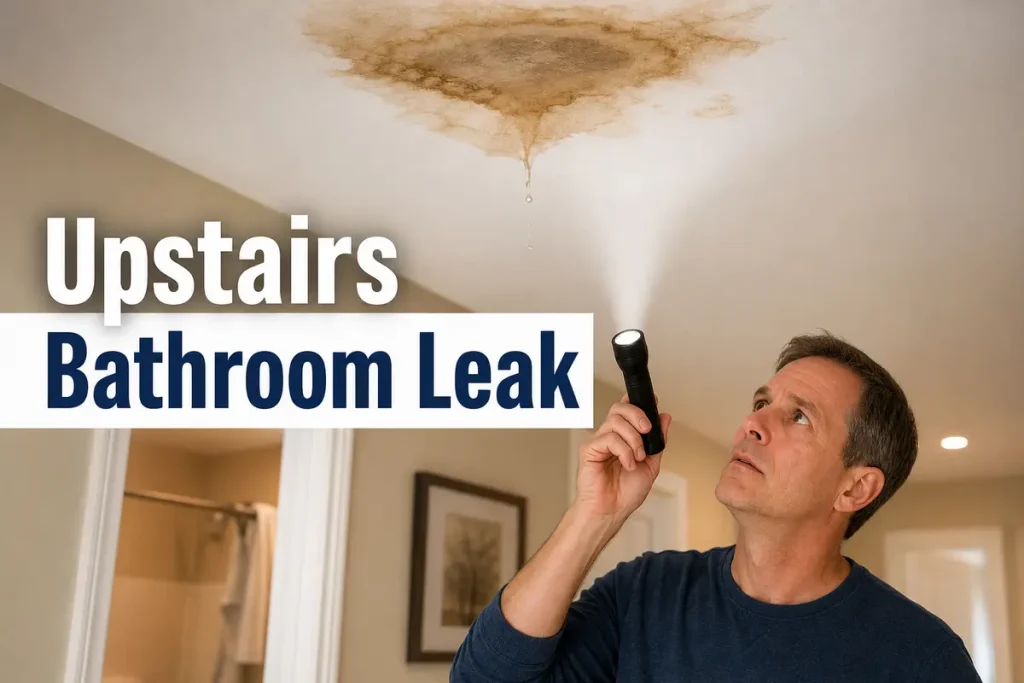
A 2024 Insurance Information Institute report found that water damage and freezing claims remain one of the most common homeowner losses. An upstairs bathroom leak gets expensive fast, especially in older Louisville homes where plaster, lath, and layered repairs hide spread, so the first place to check is the ceiling below.
What You’ll Need Before You Start
A 2024 Insurance Information Institute report on residential water claims points to the same pattern every time: faster response means less spread, less demolition, and fewer insurance disputes. What this means in practice is simple. Do not start tearing into anything until you gather a flashlight, bucket, towels, gloves, a phone camera, and access to fixture shutoffs and the main water valve.
Set those items in the room below and in the upstairs bathroom before touching any fixtures. That one setup step keeps you from walking back and forth while water keeps moving through drywall and insulation.
Step 1: Check the Ceiling Below the Bathroom Immediately
According to the Insurance Institute for Business & Home Safety, early identification of water spread cuts secondary damage, especially saturated drywall and mold-prone cavities. Your first job is not guessing the source. Your first job is confirming how active the leak is.
- Go to the room directly below the bathroom.
- Scan the full ceiling with a flashlight.
- Check for drips, staining, soft spots, and bulges.
- Look at nearby walls and light fixtures for spread.
If the ceiling feels soft or looks swollen, treat that as active damage now, not later.
Look for Visible Water Damage Patterns
Start with the obvious patterns: yellow-brown rings, peeling texture, bubbling paint, wet seams, and sagging tape lines. In a St. Matthews ranch or an Old Louisville two-story, water often travels along joists before dropping, so the stain is not always directly under the failed part upstairs.
Watch the shape. A sharp new ring or shiny wet patch means fresh movement. A broad stain with darker edges usually means repeated leaking over time.
Decide If the Ceiling Is an Emergency Hazard
A ceiling becomes a hazard when drywall sags, cracks open, or drips steadily. Clear furniture and people out from underneath immediately.
- Move anything valuable away from the area.
- Shut off electricity to the affected room if water is near a light fixture.
- Keep clear of the bulge until water is controlled.
That is the move that works. Ceiling collapse is not dramatic until it suddenly is.
Step 2: Stop the Water Source Before You Investigate Further
A 2023 EPA WaterSense summary on household leaks reinforces the simplest rule: stop active flow first, then inspect. If water is still feeding the leak, every minute adds repair cost.
- Go upstairs.
- Stop all bathroom water use.
- Shut off the nearest valve if one fixture stands out.
- Use the main shutoff if the source is unclear.
Shut Off the Nearest Fixture Valve
If the toilet supply line is dripping or the sink shutoff is wet, turn that valve clockwise until it stops. Fixture-level shutoff works best when the leak is clearly tied to one supply connection and access is easy.
Use the Main Water Shutoff If the Source Is Unclear
If the ceiling below is actively dripping and no single fixture stands out, shut off the whole property. In Jeffersontown and Middletown homes with finished basements, the main valve is often along the front foundation wall near the water entry point. Stop the spread first. Diagnosis comes second.
Step 3: Document the Ceiling Damage for Repair Planning and Insurance
A 2024 National Association of Insurance Commissioners consumer update emphasizes prompt, organized documentation after water damage. That advice pays off when adjusters, plumbers, and restoration crews all need the same timeline.
- Take wide shots of the room below.
- Take close photos of stains, drips, and bulges.
- Record the time you noticed the leak.
- Note every room and surface affected.
Before cleanup, save clear photo evidence after an overflow or leak so the condition is preserved before drying changes the appearance.
Take Wide and Close Photos Before Cleanup
Get one photo showing the whole room, then tighter shots of the damaged ceiling, wall corners, flooring, and contents. If dripping is active, record a short video.
Record What Was Running in the Bathroom
Write down exactly what happened: toilet flushed, sink drained, tub filled, shower ran, or overflow occurred. That detail speeds up source isolation and keeps repair planning focused.
Step 4: Test One Upstairs Fixture at a Time to Identify the Leak Source
A 2023 Journal of Building Engineering review on residential water intrusion found that source isolation is the fastest path to hidden leak diagnosis. Do not test everything at once. That wastes time and muddies the evidence.
- Dry visible water around fixtures first.
- Turn on one fixture only.
- Check the ceiling below after each test.
- Stop when a fresh drip or stain appears.
Test the Toilet First
Flush once, then watch around the base, supply line, shutoff, and tank bolts. Check the ceiling below for a fresh drip pattern. A wax ring failure often shows up after flushing, not while the toilet sits idle.
Test the Sink and Drain Next
Run the faucet for a minute. Then fill the basin and release it. If the leak starts during flow, suspect supply connections. If it starts on draining, suspect the trap or drain assembly.
Test the Tub and Shower Separately
Run the tub spout first without using the showerhead. Then test the shower alone. That separates drain leaks from wall spray, valve trim, door seal, or shower pan problems. In South End homes with older tile surrounds, failed caulk and wall penetrations are common leak paths.
Step 5: Inspect the Most Common Upstairs Bathroom Leak Points
A 2024 Plumbing Manufacturers International guidance summary recommends checking leak points in a fixed order: supply, seal, drain, then enclosure. Here’s how to use it. Follow the order and do not skip ahead.
- Inspect the toilet.
- Inspect the sink connections.
- Inspect tub and shower edges.
Check Toilet Seals and Supply Connections
Look at the supply line, shutoff valve, tank-to-bowl bolts, and the toilet base. Water at the base after flushing points to a failed seal. Water on the side of the tank points to hardware or supply issues.
Check Sink Traps, Supply Lines, and Shutoffs
Open the vanity and inspect the P-trap, compression nuts, faucet lines, and shutoff valves. Even a slow drip here can stain the ceiling below over weeks.
Check Tub, Shower Door, Caulk, and Grout Lines
Check for missing caulk, open grout joints, and leaking shower door sweeps. Water escaping the wet area and soaking the subfloor is a classic second-floor leak, especially in bathrooms that were cosmetically updated without correcting waterproofing details.
Step 6: Control Damage in the Ceiling Below While You Wait for Repair
A 2024 CDC mold guidance update states that wet building materials support microbial growth within 24 to 48 hours. That timeline matters. You do not have a weekend to think about it.
- Place a bucket under drips.
- Remove rugs and contents from the wet area.
- Start air movement immediately.
- Lower indoor humidity.
IICRC S500 drying standards focus on fast water removal and controlled drying because wet drywall and insulation deteriorate quickly.
Relieve Pooling Water Safely If the Ceiling Is Bulging
Put a bucket below the lowest point. If water is visibly trapped and the bulge is expanding, controlled release prevents a wider collapse. Protect yourself, keep the area clear, and avoid standing under the sag.
Start Drying the Room Below
Use towels for surface water, then run fans and dehumidification as soon as the leak stops. Success looks like this: no active drip, drying air in motion, and no spread to adjacent rooms.
Step 7: Decide When to Call a Plumber, Water Damage Pro, or Both
A 2024 American Society of Home Inspectors consumer advisory makes the division clear: plumbing repair stops the source, restoration addresses wet materials. One does not replace the other.
- Call a plumber if the leak source is active plumbing.
- Call a restoration contractor if drywall, insulation, or flooring is wet.
- Call both when the leak spread below the bathroom ceiling.
Call a Plumber for Active Fixture, Drain, or Supply Leaks
If testing points to a toilet seal, trap, valve, supply line, or drain, get the plumbing repair done before ceiling patching starts. Fixing finishes before source repair guarantees repeat damage.
Call a Water Damage Specialist for Soaked Drywall, Insulation, or Mold Risk
If the ceiling is saturated, the stain is growing, or a musty odor has started, professional drying is the right move. In Louisville humidity, delayed drying turns a simple leak into a bigger remediation job fast.
Troubleshooting Common Issues During Inspection
A 2023 International Association of Certified Home Inspectors field guide update found that intermittent leaks are often missed because testing is rushed. Slow down and match the leak to the condition that triggers it.
The Ceiling Stain Is Old, but No Water Is Dripping
An old stain still needs follow-up. Check for softness, moisture odor, and stain growth. If the patch is dry, firm, and unchanged after fixture testing, the leak is historical. If not, the problem is still active.
The Leak Only Shows up After Someone Showers
That pattern points to shower-specific failures: pan edges, door seals, valve trim gaps, wall penetrations, or failed caulk. Focus on spray and splash containment, not the sink or toilet.
You Cannot Find the Source After Testing Every Fixture
Stop opening walls blindly. Hidden line leaks, drain stack issues, and enclosure failures need professional leak detection. Random demolition just increases cost.
What You Should Expect After the Leak Is Stopped
According to a 2024 Restoration Industry Association consumer resource, proper recovery follows a fixed sequence: stop the leak, dry materials, verify drying, then repair finishes. Fixed means the source is repaired, moisture is gone, affected materials are assessed, and the ceiling is safe to patch and paint. Anything short of that is a pause, not a repair.
What to Do This Week
A 2024 FEMA home maintenance preparedness update reinforces one habit that saves real time during water emergencies: label shutoffs before a leak happens. Label the bathroom fixture valves and the main water shutoff this week, then save photos of both locations on your phone. That one step pays off the next time water starts moving through your ceiling.

Read Our Reviews