
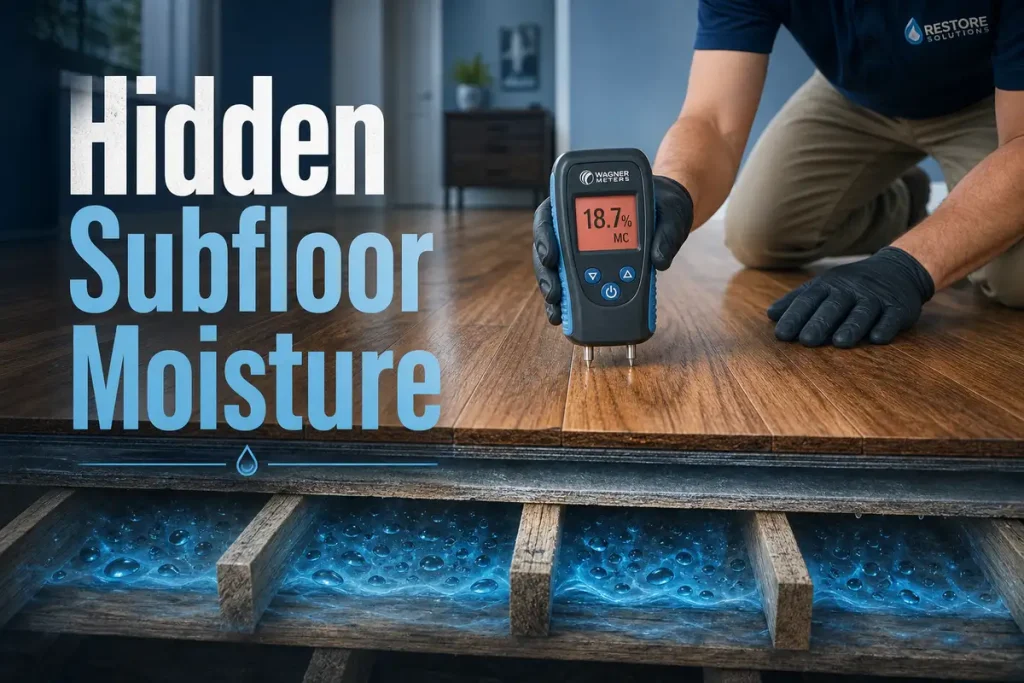
A water loss does not stop at the puddle. According to the IICRC S500 Standard for Professional Water Damage Restoration, water migrates quickly into porous materials and structural cavities, which is exactly why the difference in surface drying vs deep drying matters so much. If your floor, wall, or basement looks dry, that tells you almost nothing about what is still happening inside the structure, and that hidden moisture is where the real cost starts.
What Surface Drying and Deep Drying Actually Mean
The IICRC S500 exists for one reason: visible water is only part of a water loss. Once moisture enters drywall, subfloors, insulation, trim, framing, or air pockets behind finishes, drying stops being a cleaning issue and becomes a structural one.
Surface drying means removing water you can see and touch. Deep drying means removing water trapped inside materials and assemblies you cannot verify by eye. That distinction decides whether your property stabilizes properly or keeps deteriorating after the fans shut off.
What this means in practice is simple: appearance is not your standard. Dry-looking flooring, dry paint, and dry baseboards do not prove the building is dry. The move that works is to treat visible dryness as the start of verification, not the end of the job.
Surface drying in plain English
Surface drying is the cleanup stage most people picture after a leak or flood. Standing water gets extracted. Floors get mopped. Wet contents get wiped down. Air movers get placed across the room. Dehumidifiers start pulling moisture out of the air. On a tile floor with a small, clean spill caught immediately, that can be enough.
But surface drying creates false confidence fast.
The top of a hardwood plank can feel normal while the underside stays wet. Painted drywall can look fine while the paper facing and gypsum core still hold moisture. Carpet fibers can dry much faster than the pad and subfloor underneath. In other words, your eyes report progress long before the structure is actually stable.
The action to take here is direct: stop using touch and appearance as the test for “dry.”
Deep drying in plain English
Deep drying is what happens after water moves below the surface. It targets the moisture inside subfloors, drywall cores, wall cavities, insulation, framing, plaster, trim, cabinetry voids, and the air spaces behind finishes.
Think of it like drying a soaked sponge inside a zippered cushion. Wiping the outside changes how it looks. It does not remove the water trapped in the middle. Buildings behave the same way after a water loss, just with more expensive consequences.
Deep drying uses measurement, controlled airflow, dehumidification, temperature management, and targeted access to pull moisture out of the structure until readings return to an accepted dry standard. That is the standard that protects your materials, your indoor air, and your insurance position.
Why “Looks Dry” Is the Most Expensive Mistake
The EPA’s mold guidance states that mold can begin growing on damp materials within 24 to 48 hours. That timeline is short, and it turns a simple water loss into a much more expensive restoration problem if hidden moisture remains.
Water does not stay where it lands. It moves by absorption into porous materials like drywall and wood. It wicks sideways and upward through capillary action, which is why baseboards, lower wall sections, and cabinet ends get wet beyond the obvious source. It also shifts as vapor, especially in warm, humid conditions, spreading moisture into nearby materials that never had visible contact with standing water.
What this means in practice for Louisville properties is brutal. Hardwood over crawlspaces absorbs moisture from both directions. Old Louisville plaster walls hold water in layered materials that dry slowly and unevenly. Finished basements trap moisture behind paneling, flooring, and insulation. Small commercial suites often have layered flooring systems that hide moisture under LVP, glue-down products, and underlayment.
If you rebuild, repaint, or close up walls before the structure is verified dry, you lock damage in place. The single action that protects you is this: require moisture verification before any rebuild or cosmetic repair begins.
How moisture hides inside common building materials
Drywall is deceptive. The painted face can look normal while the gypsum core stays wet, especially near the bottom of the wall or around insulation-filled cavities. Wood framing absorbs water along the grain and releases it slowly, which is why studs and sill plates often remain wet after the room feels dry.
Insulation is worse. Fiberglass loses performance when wet and holds moisture against adjacent framing and drywall. Cellulose holds even more water. Carpet can dry fairly quickly at the surface, but the pad underneath acts like a reservoir. Subfloors, especially OSB and plywood, soak up water and release it over days, not hours. If you are dealing with wood flooring, the real danger often sits below the visible surface, which is why understanding what hidden moisture does under finished floors matters early.
Plaster and masonry in older homes add another layer of risk. Dense materials do not always show obvious staining right away, but they can hold and redistribute moisture for a long time. Cabinets and vanities, especially particleboard units, swell internally before the damage becomes visible at doors, trim, or finishes.
The practical takeaway is straightforward: the slower a material releases water, the less useful a visual inspection becomes.
Why Louisville homes and buildings face extra risk
According to Climate.gov’s regional climate reporting, the Ohio Valley deals with frequent heavy rain events, high seasonal humidity, and repeated storm-related water intrusion. In Louisville, that combines with a housing stock that ranges from historic plaster-and-lath homes to slab-on-grade suburban builds and basement-heavy older properties.
That mix matters because each construction type traps water differently. Basements and crawlspaces keep relative humidity elevated even after extraction. Older homes have layered materials and hidden voids that dry slowly. Summer storms raise outdoor moisture levels, which makes indoor drying harder if equipment and pressure conditions are not managed correctly.
Here’s how to use that: in Louisville, deep drying is not an upgrade. It is the baseline whenever water enters assemblies, basements, crawlspaces, wall cavities, or wood flooring systems.
The Science Behind Deep Drying
The ANSI/IICRC S500 explains drying through psychrometrics, but the simplest version of this is easier than it sounds: wet materials dry only when surrounding air has room to accept more moisture. If indoor air is already damp, evaporation slows down or stalls.
Air movers help by disturbing saturated air at the material surface. That speeds evaporation from exposed wet areas. But air movers alone do not finish the job if the room stays humid. Once moisture enters assemblies, successful drying depends on airflow, dehumidification, temperature control, and sometimes pressure-based specialty systems.
What this means in practice is that equipment count is the wrong question. A room full of fans does not prove a drying strategy exists. The action that protects you is to ask for the drying plan, not just the number of machines.
Evaporation, airflow, and humidity
Evaporation is the process of water leaving a wet material and entering the air. Airflow helps because moving air strips away the thin, damp boundary layer sitting on top of the wet surface. That keeps evaporation going faster.
But here is the catch: if the room air stays loaded with moisture, the process slows down. The material is trying to release water into air that has no drying capacity left. So you get the noise of active drying without the result of actual structural drying.
That is why a freshly flooded room can feel breezy and still remain wet inside walls, under flooring, or inside cabinets. Airflow handles the exposed edge of the problem. It does not solve the hidden part by itself.
The practical move is to judge drying by changing moisture readings, not by how much air movement you feel in the room.
Why dehumidification changes the outcome
The EPA explains indoor humidity control as a core part of preventing moisture-related indoor air issues. In water damage restoration, dehumidification is what restores the air’s ability to accept more moisture from wet materials.
Refrigerant dehumidifiers pull water from warmer, moisture-laden air and work well in many indoor drying conditions. Desiccant dehumidifiers use a moisture-absorbing material and excel when lower-grain air is needed, especially in cooler spaces or dense materials that need a stronger drying pull.
What this means in practice is simple. If fans are the engine pushing evaporation at the surface, dehumidifiers are the exhaust system removing that moisture from the environment. Without them, the process backs up.
Ask for one specific thing: how the indoor humidity and grain depression are being controlled during drying.
The role of temperature and vapor pressure
Temperature affects how quickly water evaporates and how much moisture air can hold. Warmer air can carry more water vapor, which often speeds drying when managed correctly. But heat alone is not the answer.
The plain-English version of vapor pressure is this: moisture moves from areas with more energy and more moisture toward areas with less. Controlled heat can increase that movement and help release moisture from wet materials. Uncontrolled heat can do the opposite by driving moisture deeper into assemblies, damaging finishes, or creating condensation in cooler cavities.
That is why experienced drying plans use heat as a controlled variable, not a blunt tool. The right action is to ask how temperature is being managed and measured, especially in basements, wall cavities, and hardwood floor losses.
Surface Drying vs Deep Drying: A Direct Comparison
According to the Institute of Inspection, Cleaning and Restoration Certification, successful water restoration requires returning affected materials to a documented dry standard, not simply making surfaces look clean. That is the line between surface drying and deep drying.
Surface drying is faster to start, cheaper to quote, and less disruptive in the short term. It focuses on extraction, visible cleanup, airflow across exposed surfaces, and basic humidity reduction. In a very limited loss, that is enough.
Deep drying is slower to assess but far more accurate. It includes moisture mapping, hidden-area inspection, target-based equipment setup, daily monitoring, and verification before rebuild. Up front, it can feel like the more expensive path. In reality, it reduces total cost because it prevents rework, mold issues, flooring failure, reopened walls, and claim disputes.
The simplest version of this comparison is blunt. Surface drying treats what you can see. Deep drying treats what actually got wet.
Your action here is clear: compare restoration scope based on moisture mapping and drying targets, not on the lowest estimate.
Where surface drying is enough
Surface drying is enough only in narrow, specific situations. Think of a very small clean-water spill on a non-porous floor, discovered immediately, with no seepage under trim, below flooring, into drywall, or into adjacent rooms.
A tipped appliance tray on sealed tile fits that description. A short-lived countertop overflow fully contained on stone or vinyl can fit too. The moment water reaches absorbent material, penetrates seams, enters cavities, or sits long enough to soak below the visible layer, that narrow exception ends.
This is why most real property losses do not stay in the “surface only” category for long.
Where deep drying is mandatory
Deep drying becomes mandatory when water enters the structure, period. Category 2 or 3 water, sewage backup, storm intrusion, soaked subfloors, wall wetting, ceiling leaks, roofing failures, wet insulation, repeated leaks, and any loss older than 24 hours all fall into this group.
Once moisture moves into assemblies, the standard changes. Hidden moisture starts driving odor, microbial growth, swelling, adhesive breakdown, and secondary damage even when the room appears improved.
If a contractor proposes cosmetic drying on a structural water loss, that scope is too small.
The Hidden Damage You Do Not See Right Away
The Centers for Disease Control and Prevention states that damp indoor environments are linked to mold growth and poor indoor air quality. In a property loss, that hidden dampness also damages materials long before the damage becomes obvious.
Trapped moisture starts a chain reaction. Wood swells, then cups or crowns. Adhesives soften and fail. Fasteners corrode. Paint loses bond. Cabinet boxes distort. Drywall sags. Odors settle into porous materials. Occupants begin noticing air quality complaints before the source is visible.
What this means in practice depends on your role. If you live in the home, you deal with recurring odor, damaged finishes, and a space that never feels right. If you manage rentals, you deal with complaints, callbacks, possible vacancy, and liability. If you own a small commercial property, you deal with interrupted operations, finish failures, and disputes over scope.
The action to take is simple and powerful: document every affected room before cosmetic repairs begin.
Mold growth and indoor air problems
Mold needs moisture, an organic food source, and time. After a water loss, drywall paper, wood, dust, carpet backing, and cabinetry provide more than enough food. If materials stay damp, growth starts fast.
That matters even more in rental units, occupied homes, daycare settings, clinics, and small offices where air complaints turn into trust problems quickly. The room can smell stale before visible mold appears. Occupants notice irritation, mustiness, and that “something is off” feeling long before a wall gets opened.
The move that works is aggressive moisture control early, not odor treatment later.
Structural and finish damage
A room can look fine and still be heading toward expensive failure. Hardwood cups when the underside stays wetter than the top. Trim swells at the back edge first. Cabinets delaminate from inside the toe-kick and side panels. Drywall seams telegraph after repaint. Tile loosens when setting materials remain damp. Metal fasteners and corner beads start corroding in hidden cavities.
These delayed failures are exactly why delayed callbacks happen after “successful” cleanup jobs. By the time the damage becomes visible, the original dry-out phase is over and the repair scope is larger.
If you are dealing with wood flooring, pay close attention to how early action changes the outcome before warping accelerates.
Insurance and liability fallout
Incomplete drying creates claim friction fast. Supplemental claims increase because hidden damage appears later. Portions of the original claim face dispute because the insurer sees later damage as a separate issue or questions mitigation. Tenants report recurring odor or mold concerns. Business occupants lose more time when walls or flooring have to be reopened.
From a liability standpoint, the problem is not just the water loss. The problem is failing to document that the structure was dried to an objective standard before rebuild.
That is why good drying records protect more than materials. They protect your position.
How Professionals Confirm True Dryness
The IICRC S500 Standard makes this clear: drying is measured, not guessed. A room is not dry because it looks better, smells cleaner, or has had fans running for three days. It is dry when affected materials meet established dry goals based on unaffected comparison areas, material type, and environmental conditions.
That process relies on moisture meters, hygrometers, psychrometric readings, thermal imaging, and documented moisture mapping. Each tool serves a different purpose. None of them replaces the others.
What this means in practice is that you should expect numbers, locations, targets, and final verification, not vague reassurance. The action to take before work starts is to ask for dry standard targets in writing.
Moisture meters and moisture mapping
Moisture meters are the backbone of structural drying verification. Pin meters measure moisture content inside materials by penetrating the surface. Pinless meters scan broader areas and help locate patterns quickly without making holes everywhere.
The real value comes from comparison. Readings from affected areas mean much more when compared against unaffected materials in the same property. That establishes a realistic dry standard for that specific building.
Moisture mapping turns those readings into evidence. Instead of “the wall seemed damp,” you get a documented spread pattern showing where moisture entered, how far it migrated, and what is drying over time. That changes the entire conversation with contractors, adjusters, and occupants.
Thermal imaging and what it can and cannot prove
Infrared cameras are useful, but they get misunderstood constantly. An IR image shows temperature differences. Wet areas often appear cooler because evaporation changes surface temperature. But a cool spot is not automatic proof of moisture, and a normal-looking image is not proof of dryness.
Thermal imaging helps identify suspect zones fast, especially behind walls, across ceilings, and around floor transitions. Then those zones need meter confirmation.
The practical takeaway is this: infrared is a search tool, not a final answer.
Drying goals, daily logs, and final clearance
Professional drying has a start point, a monitoring phase, and an end point. Baseline readings establish what got wet and what dry looks like in unaffected areas. Daily logs show environmental conditions, equipment performance, and material readings over time. Equipment gets adjusted based on those numbers.
Final clearance means the structure reached documented targets before rebuild begins. That protects flooring installers, painters, cabinet crews, tenants, and your insurance file. It also protects you from the “it looked dry” argument later.
If a job has no daily readings, it has no real drying record.
Common Situations Where Surface Drying Fails
Claims patterns across the restoration industry repeatedly trace expensive callbacks to hidden moisture left in assemblies, not missed puddles. The visible water gets handled. The concealed water gets ignored. That is where superficial cleanup fails.
The same trouble spots come up again and again: under flooring, behind baseboards, inside wall cavities, below cabinets, and in insulated exterior walls. Those areas stay wet because they are shielded from simple airflow and often dry much slower than the room around them.
The action that protects your property is direct: insist on inspection beyond the obvious wet area.
Hardwood floors over wet subfloors
Hardwood flooring is notorious for surface-dry deception. The finish can regain its normal sheen while the subfloor underneath stays wet. As that imbalance continues, boards cup. If aggressive top-down drying is used without balancing the subfloor, the floor can later crown or split.
This is especially common over crawlspaces, over basements, and over wood subfloors that absorbed large volumes from below. The top layer improves first. The structural layer lags behind.
A fan aimed across the room does not solve a moisture imbalance trapped under hardwood.
Wet drywall with dry paint
Drywall often passes a visual check long before it is actually dry. Paint film can look perfect while the paper backing, gypsum core, insulation, and studs remain wet. Roof leaks, window intrusion, pipe leaks, and ice-maker line failures all create this pattern.
The wall face becomes the most misleading part of the assembly. If only the visible stain is addressed, the wet cavity stays in place behind a nice-looking surface.
That is why wall moisture has to be measured at depth and across height, not just inspected visually.
Basement and crawlspace moisture migration
Basements and crawlspaces keep moving moisture after standing water is gone. Concrete slabs release water slowly. Masonry walls wick moisture. Sill plates, lower framing, stored contents, and HVAC components absorb and redistribute dampness. In humid weather, the problem compounds because outside air adds more moisture whenever doors open or air exchange is unmanaged.
This is one of the most common reasons a lower level smells musty after “cleanup.” The floor is dry enough to walk on, but the environment never got fully stabilized.
Cabinets, vanities, and built-ins
Cabinets hide damage well because the trapped voids dry slowly. Toe-kicks create enclosed pockets. Particleboard side panels swell from the bottom up. Vanity backs trap moisture against walls. Built-ins restrict airflow behind and beneath them.
By the time doors stick or veneer bubbles, the drying window was already missed. Kitchens and bathrooms are especially vulnerable because leaks often start small and stay hidden longer.
If a loss involved cabinetry, the hidden voids need their own inspection and drying strategy.
How Deep Drying Is Done Step by Step
Controlled drying works best when sequence drives the job. The IICRC S500 emphasizes immediate extraction, evaluation, and ongoing monitoring because the fastest gallon to remove is standing water, and the hardest gallon to remove is the one that soaked into the structure.
A proper deep drying sequence follows a clear order. Stop the source. Remove bulk water. Inspect and map moisture. Set containment or safety controls if needed. Open materials strategically. Deploy drying equipment based on the actual wet load. Monitor daily. Verify dry standard before repair.
What this means in practice is that demolition should never come first by habit and cosmetic cleanup should never come first by appearance. The action to take is to ask any contractor to explain the sequence before demolition starts.
Extraction comes first
Extraction removes the largest volume of water at the lowest cost and with the least damage. Truck-mounted or portable extractors pull standing water and moisture from carpet and pad far faster than evaporation ever can.
That matters because every gallon removed by extraction is a gallon that does not need to evaporate into your home or building. Faster extraction shortens drying time, reduces secondary damage, and improves salvage chances for flooring and contents.
But extraction is not the end of drying. It is the beginning.
Opening materials strategically
Strategic opening means creating enough access to dry hidden moisture without turning a controlled loss into unnecessary demolition. That can include lifting carpet edges, removing baseboards, drilling small wall access points, opening limited drywall sections, or detaching toe-kicks.
Done correctly, targeted access reduces total damage because trapped moisture gets released early. Done poorly, avoided access leaves hidden moisture in place until damage spreads further.
The move that works is selective opening based on readings, not random tear-out and not wishful thinking.
Drying chambers, injectidry, and specialty systems
Some materials need more than open-room airflow. Floor-mat systems draw moisture from beneath hardwood or engineered flooring. Wall-cavity systems push or pull dry air through drilled access points. Negative-pressure and positive-pressure setups help dry enclosed spaces. Specialty systems handle plaster, dense framing, and layered floor assemblies with more control.
This is where deep drying differs most from ordinary cleanup. The goal is not to make the room feel dry. The goal is to change conditions inside the trapped wet assembly.
If a contractor only offers fans and dehumidifiers for every type of loss, the approach is too generic.
Monitoring and adjusting until dry goals are met
Drying is not a set-it-and-forget-it process. Readings change. Materials respond at different speeds. Equipment placement that worked on day one may be wrong on day three. Successful drying involves adjusting air movement, dehumidification, temperature, and access based on measured progress.
That daily adjustment is what turns equipment into a drying system. Without monitoring, the process becomes a guess.
Ask for updates tied to readings, not vague status reports.
Choosing the Right Approach for Different Types of Damage
Water category and material response determine the correct drying path. The IICRC S500 classifies water losses by contamination level and evaluates how deeply materials are affected. That framework matters because clean water, sewage, firefighting water, and storm intrusion do not get handled the same way.
The right decision is not based on where the water came from alone. Duration, spread, material absorption, and contamination all shape scope. That is why a small clean-water leak left overnight can require deeper intervention than a brief visible spill handled immediately.
The action to take before approving scope is to classify the loss first.
Clean water losses
Clean water from a supply line, refrigerator line, sink overflow, or appliance leak sounds less serious, but that label only describes contamination at the source. It does not describe how far the water traveled or how long materials sat wet.
Once clean water soaks drywall, underlayment, subfloors, insulation, or cabinetry, deep drying becomes necessary because material penetration, not just source type, controls the risk. A clean-water event ignored long enough stops being a simple cleanup problem.
The practical takeaway: do not confuse “clean source” with “surface-only damage.”
Sewage backups and contaminated water
Sewage backups and category 3 water losses require much more than drying. Contaminated materials often need removal, cleaning, disinfection, and stricter containment and safety controls. Deep drying still matters, but it works alongside sanitation and disposal decisions.
In these losses, saving hidden wet materials just because they are not visibly damaged is the wrong goal. Health protection and contamination control come first.
That makes objective scope even more important, especially in rentals, food-service spaces, and occupied commercial units.
Firefighting water after a fire
After a fire, the water problem is usually massive and deep. Fire suppression water penetrates ceilings, insulation, wall cavities, floors, and contents fast. At the same time, soot and odor residues complicate drying because materials cannot simply be left wet while cleaning decisions drag out.
This is a compound loss. You are not just drying water. You are stabilizing a structure carrying moisture, residue, odor, and often damaged HVAC pathways all at once.
That is why firefighting water almost always requires a true deep-drying plan.
Storm and roof leaks
Storm and roof leaks create hidden pockets because water enters from above, follows framing paths, and repeatedly wets insulation, ceiling cavities, wall tops, and attic materials. The repeated wet-dry cycle is especially damaging because the stain you finally notice is often far from the actual entry point.
By the time a ceiling spot appears, multiple layers can already be affected. Surface drying of the stain area misses the actual spread pattern almost every time.
Roof and storm losses demand tracing and drying the pathway, not just the visible endpoint.
What This Means for Your Insurance Claim
According to the Insurance Information Institute, property owners have a duty to mitigate damage after a covered loss. In plain English, that means you need to act promptly and document what was done to prevent further damage. Deep drying supports that duty far better than visual cleanup because it creates measurable proof.
When drying is documented properly, coverage discussions get clearer. Scope is easier to justify. Supplemental requests are easier to support. Reopened walls and delayed material failures are less likely to become claim disputes because the drying record shows what was wet, what was done, and what dry standard was achieved.
This also helps separate emergency mitigation from rebuild. Mitigation stabilizes the property and prevents further damage. Rebuild restores finishes after drying is complete. Contents handling often runs on its own track. Confusing those phases creates paperwork problems and scope disputes.
The action that protects you best is simple: save drying logs, photos, and moisture reports in one claim folder.
Why documentation protects you
Documentation turns a water loss from an argument into a file. Photos show conditions at the start. Meter readings prove spread and severity. Daily notes show that mitigation happened promptly and professionally. Final readings support closure before repairs begin.
That record matters if floor damage appears later, if a tenant reports odor, if an adjuster questions scope, or if multiple contractors become involved. Without documentation, every conversation becomes memory against memory.
With documentation, the facts stay in front.
Questions adjusters and contractors should answer clearly
You need direct answers to a few basic points. What got wet? How far did moisture spread? What was removed? What was dried in place? How was dry standard verified? If any of those answers stay vague, the scope is not ready.
Those questions are not aggressive. They are normal. A serious contractor can answer them with readings, photos, and a plan. A serious adjuster understands why those answers matter for accurate coverage review.
If the job is real, the documentation is real too.
Red flags in low-scope estimates
Low-scope estimates often sound appealing because they promise speed and less disruption. But the warning signs are easy to spot. No moisture mapping. No monitoring visits. No line items for dehumidification. No explanation of what is wet below the surface. “Dry in 24 hours” promises with no baseline readings. Cosmetic repair discussed before structural drying is verified.
Those shortcuts do not save money. They delay the real cost until later, when the evidence is harder to track and the repair scope gets larger.
Common Misconceptions About Surface Drying vs Deep Drying
The IICRC S500 exists in part because common assumptions about drying are wrong. People trust what they see, what they can touch, and what feels improved. Water damage ignores all three.
The simplest version of this section is that moisture problems are measurement problems. If a disagreement comes down to opinion, the job is not being evaluated properly. Objective readings settle the issue.
The action to take is direct: use measurement, not debate, to decide whether drying is complete.
“If it is dry to the touch, it is dry”
A dry surface only tells you the outer layer lost enough moisture to feel normal. It says nothing about what is happening inside the material or behind it. Drywall, wood, plaster, and subfloor systems regularly test wet after they feel dry at the surface.
That is why touch is a comfort test, not a drying test.
“More fans always solve the problem”
Fans help evaporation at exposed surfaces, but they do not remove moisture from the air. Without dehumidification and proper environmental control, more fans can stall progress, spread dust, and worsen contamination movement in dirty water or post-fire losses.
Airflow is one part of drying. It is not the whole strategy.
“Deep drying always means full demolition”
Deep drying often saves materials when started early and guided by readings. Specialty systems can dry wall cavities, subfloors, hardwood assemblies, plaster, and built-ins with targeted access instead of total tear-out.
Demolition has a place, especially in contaminated losses or unsalvageable materials. But “deep drying” does not automatically mean “rip everything out.”
“Skipping deep drying saves money”
Skipping deep drying reduces the first invoice and increases the final cost. Mold remediation, warped flooring, failed cabinets, repainting, reopened walls, delayed occupancy, and claim disputes all cost more than proper drying at the start.
Short-term savings in scope create long-term losses in materials, time, and documentation.
How to Choose a Restoration Company That Actually Dries the Structure
Contractor quality varies widely, and complaint patterns usually come down to the same failures: weak inspection, poor communication, generic equipment placement, and no measurable proof of drying. That is why standards and process matter more than marketing claims.
A serious restoration company treats drying as a documented technical process, not as fan rental plus cleanup labor. Qualifications matter. Monitoring matters. Local building knowledge matters. Communication matters too, especially when insurance is involved.
The action to take before signing anything is to ask one measurement-based question: “How will you prove this structure reached dry standard before rebuild starts?”
Certifications, standards, and training
Look for IICRC training and active use of the S500 standard in actual field process, not just a logo on a truck. Experience with historic homes, rental units, basements, hardwood flooring, plaster walls, and small commercial spaces matters because those assemblies behave differently during drying.
In Louisville, that experience is not a bonus. It changes outcomes.
Equipment, monitoring, and reporting
A serious drying contractor provides a moisture map, an equipment plan, daily monitoring, and final documentation. Equipment should match the loss, not a one-size-fits-all package. Reports should show readings, affected areas, goals, and progress.
If the process has no written targets and no daily data, it is not a true drying program.
Local fit for Louisville properties
Louisville properties bring specific challenges: plaster in older neighborhoods, hardwood in established homes, basement moisture, crawlspaces, humidity-heavy summers, mixed-material additions, and storm-driven intrusion. A contractor unfamiliar with those conditions is more likely to under-scope hidden moisture.
Local fit matters because drying is not just about machines. It is about understanding how your building type traps and releases water in this climate.
What to Do This Week if Your Property “Looks Dry”
Visible dryness is not proof of structural dryness. That is the core truth behind surface drying vs deep drying, and once you understand it, water damage decisions get much clearer. You stop judging progress by appearance and start judging it by verified moisture conditions.
Your move this week is simple: schedule a moisture inspection, or if a claim is already underway, request a written moisture map and dry standard targets before any repainting, flooring install, or rebuild begins. That one step changes the entire outcome because it replaces guesswork with evidence.
Most structural drying jobs take several days, not several hours. The exact timeline depends on how much material absorbed water, how long the loss sat, indoor humidity, temperature, and whether cavities or subfloors are involved. The only reliable answer comes from daily readings, not a fixed promise.
Yes. Odor often lingers because hidden materials remain damp. Wet framing, insulation, carpet pad, subfloors, and cabinetry voids can keep releasing moisture and odor even after exposed surfaces look normal.
No. Targeted drying often saves drywall when the right access, airflow, and dehumidification strategy starts early enough. But if contamination is present, insulation is saturated, or the wall assembly cannot be dried to standard, removal becomes necessary.
If the leak stayed fully on a non-porous surface and was cleaned immediately, surface drying can be enough. If water entered drywall, wood, cabinets, trim, subfloor, or insulation, deep drying is worth it because that is where delayed damage starts.
Covered claims often include reasonable mitigation and structural drying when the scope is documented properly. The strongest support for coverage is a clear record showing what got wet, how moisture spread, what equipment was used, and how dry standard was verified.
The biggest warning sign is a job with no moisture readings, no daily monitoring, and no final documentation. If completion was based on appearance, touch, or elapsed time alone, the structure was not properly verified.

Read Our Reviews