
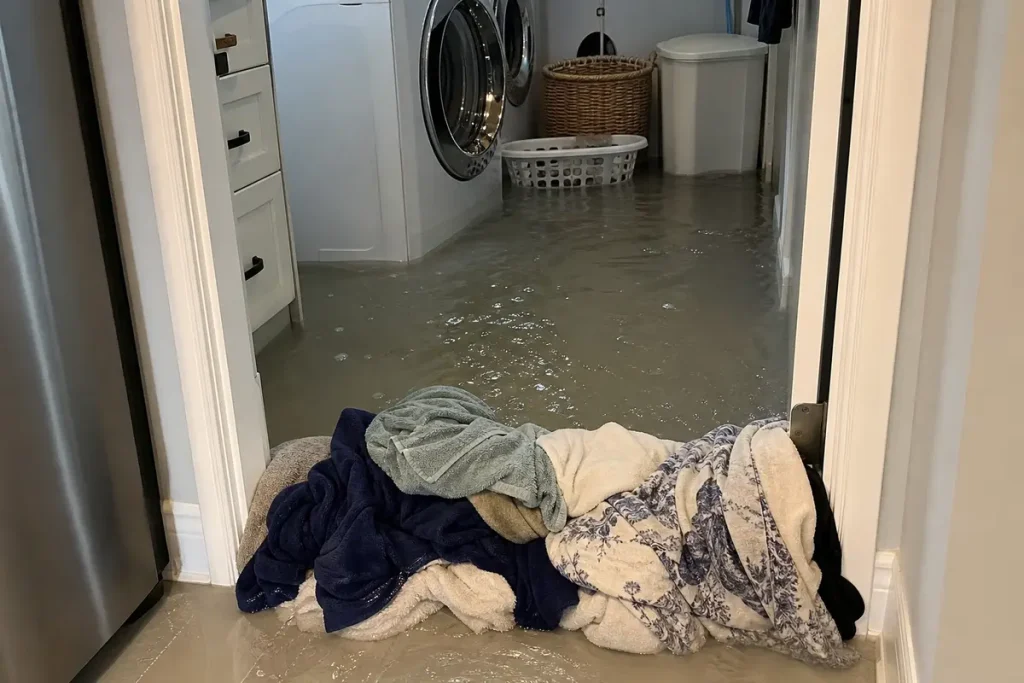
A washing machine flooded laundry room event is not a simple mess. It is a time-sensitive water-loss claim, and the first hour drives repair cost, mold risk, downtime, and what can still be saved. Based on analysis of recurring appliance-loss patterns in Louisville homes, the recommendation is to treat the first six steps as loss control, not housekeeping. For professional help, contact Bear Restoration’s water damage restoration team.
What This Emergency Costs If Handled Slowly
What the field data shows is blunt: delay gets expensive fast. Water damage and freezing account for 27.6% of homeowners claims, and the average payout sits around $13,954. In practical terms, a laundry room leak that looks minor at 8:00 a.m. can turn into warped flooring, swollen baseboards, wet insulation, and ceiling staining below by lunchtime.
The business outcome is simple. Fast shutdown protects salvageable materials, reduces demolition, and improves claim documentation. Slow response drives secondary damage, especially in older Louisville housing stock where plaster walls, original hardwood, and tight floor cavities hold moisture longer than many owners expect.
Mold pressure starts early. The EPA and insurance loss data both support the same timeline: wet materials left in place for 24 to 48 hours become a mold problem, not just a water problem. That timeline matters in Old Louisville duplexes, East End finished basements, and South End slab homes alike. Once water migrates under flooring or into wall cavities, surface drying no longer solves the loss.
What to Gather Before Starting
Before Step 1, the response needs a small control kit. The recommendation is to gather shutoff access, absorbent towels, a mop, a wet/dry vacuum, box fans or air movers, gloves, a flashlight, and a phone for photos and notes.
Just as important, the property file should include contact information for a plumber, electrician, and restoration company. That shortens time-to-repair if the source remains active, if breakers need to be shut down, or if hidden moisture pushes the event beyond household cleanup.
A second priority is documentation. Photos taken before cleanup, during extraction, and after drying starts often support faster insurance handling because they show the source, the path of travel, and the materials affected.
Step 1: Stop the Washer Cycle and Stop the Water Source
- Stop the machine at the controls.
- Close the hot and cold supply valves behind the washer.
- If the leak is forceful or a hose has burst, shut off the home’s main water supply immediately.
This is the first loss-control phase. A washer can release gallons in minutes, so every minute of active flow expands the affected area.
Turn Off the Machine at the Controls First
- Press pause, cancel, or power off at the control panel.
- Wait for filling or draining sounds to stop.
- Do not reach behind the machine first if water is spreading near cords or outlets.
The reason is speed. Stopping the cycle ends active fill or drain commands before the leak worsens. Success at this checkpoint looks like silence from the unit and no ongoing discharge into the tub or standpipe.
Shut Off the Hot and Cold Supply Valves Behind the Washer
- Reach the local shutoff valves only if the area is safe and stable underfoot.
- Turn both valves clockwise until fully closed.
- Watch the floor for 30 to 60 seconds to confirm active flow has slowed or stopped.
Based on field response patterns, local valve shutoff is the fastest way to reduce total water loss when access is clear. If the valves are stiff, corroded, or inaccessible because the machine is pinned tightly to the wall, that itself becomes part of the repair scope. Properties that have not reviewed when supply lines should be retired often discover the failure only after the flood.
Use the Home’s Main Water Shutoff If a Hose Burst Prevents Local Control
- Go straight to the main shutoff if a hose is spraying, the local valves cannot be reached, or a fitting has separated.
- Shut the main valve fully.
- Confirm water has stopped at the laundry area before moving to cleanup.
This is the correct call in a high-volume release. Trying to wrestle a ruptured hose behind a running washer wastes time and increases damage. In many Louisville homes, especially older properties with tighter utility closets, the main shutoff is the faster route.
Step 2: Cut Electrical Risk Before Touching Standing Water
- Stop and assess where the water has traveled.
- Keep hands out of standing water until electrical exposure is ruled out.
- Shut power at the breaker when water is near outlets, cords, or the plug.
A flooded laundry room is also an electrical incident. Water near energized components creates both shock and fire risk.
Leave the Washer Plugged in Only Until the Area Is Safe to Approach
- Do not unplug the washer while standing near pooled water.
- Do not touch power strips, extension cords, or the appliance cord if water is nearby.
- Create distance first, then isolate power safely.
The sequence matters. If the plug sits dry and the floor path is dry, unplugging is acceptable. If not, the area is unsafe. That is the point to stop direct contact and move to the breaker.
Shut Power at the Breaker If Water Is Near Outlets or the Cord
- Go to the electrical panel.
- Shut off the laundry circuit breaker.
- If the correct breaker is unclear or water has reached multiple circuits, shut off the main breaker and call an electrician.
This step protects occupants, contractors, and the property itself. Water reaching receptacles, cord ends, or surge devices changes the job from cleanup to hazard control. If the leak came from an upstairs laundry, the chance of concealed electrical exposure below rises sharply. In those losses, guidance from ceiling leak warning signs becomes relevant fast.
Document Unsafe Conditions for Insurance and Contractor Handoff
- Photograph outlets near the water path.
- Capture the plug, cord, breaker panel, and any tripped devices.
- Note any sparking smell, breaker trip, or visible staining below the room.
These records support claim review and help the electrician or restoration crew scope the right response on arrival.
Step 3: Contain the Spread to Protect Floors, Walls, and Nearby Rooms
- Block water migration with towels or absorbent barriers.
- Remove items that trap moisture.
- Check adjoining rooms and levels below.
This phase reduces secondary loss. The recommendation is to protect edges first, because edge loss is where hidden damage starts.
Use Towels, Mops, and a Wet/dry Vacuum to Control Active Spread
- Lay towels at door thresholds, baseboard lines, and transitions to carpet or hardwood.
- Use a wet/dry vacuum on pooled water.
- Mop remaining film toward the extraction point.
High-risk edges deserve first attention. Water that disappears under laminate, vinyl plank, or base trim is no longer visible, but it is still active. That is often how a one-room event becomes a multi-room repair.
Move Laundry Baskets, Rugs, Cleaning Supplies, and Stored Items
- Remove rugs and hampers first.
- Move detergents, paper goods, and cardboard storage off the floor.
- Separate damaged contents and photograph them before disposal.
Stored contents become both a moisture trap and a documentation problem. Wet cardboard, fabric, and paper accelerate odor and complicate claim valuation. The data shows that overflow damage spreads fast, especially when absorbent contents stay in place.
Protect Adjoining Rooms and Lower Levels
- Check hall flooring outside the laundry room.
- Inspect floor registers, floor penetrations, and baseboard corners.
- If the laundry is above another room, inspect the ceiling below for staining, sagging, or drips.
This checkpoint matters in split-levels, townhomes, and second-floor laundry layouts. Water follows gravity, seams, and penetrations. It rarely stays where it started.
Step 4: Remove Standing Water and Begin Drying Immediately
- Extract standing water.
- Start airflow across wet surfaces.
- Add dehumidification as soon as possible.
This is the mold-prevention phase. Wet materials left beyond the 24 to 48 hour window move the job toward demolition and microbial treatment.
Extract Visible Water in the Correct Order
- Remove pooled water from open floor surfaces first.
- Target corners, appliance footprints, and low spots second.
- Lift and dry removable mats or trays separately.
The correct order preserves time and equipment capacity. Open standing water contributes the most active spread. Low spots and hidden edges hold the remainder and often explain why a room still smells damp after surface cleanup.
Start Airflow and Dehumidification
- Position fans to move air across wet surfaces, not directly into walls.
- Open interior cabinet doors and nearby room doors.
- Run a dehumidifier continuously and empty it as needed.
Drying is about sustained moisture removal, not just evaporation. Air movement lifts moisture from materials, and dehumidification removes that moisture from the air so the room can keep drying. If HVAC components were affected, the system should not be used for drying until inspected.
Know When Household Drying Is No Longer Enough
- Escalate when flooring cups, swells, or sounds hollow.
- Escalate when baseboards are damp, drywall is soft, or moisture returns after wiping.
- Escalate when odor develops or humidity stays elevated despite fans and dehumidifiers.
That threshold arrives quickly when water reaches under sheet vinyl, laminate seams, hardwood, cabinets, or wall cavities. At that point, professional extraction, moisture mapping, and equipment are the recommendation.
Step 5: Find the Cause Before Restarting Anything
- Inspect supply hoses.
- Inspect the drain path.
- Inspect the machine for overflow triggers.
- Assign the repair to the right trade.
Restarting before diagnosis creates repeat loss. That is one of the most expensive mistakes in appliance water events.
Inspect Supply Hoses for Bursts, Cracks, Bulges, and Loose Fittings
- Pull the washer forward carefully after the area is dry enough to move it safely.
- Check both supply hoses end to end.
- Replace any hose with cracks, bubbles, blisters, corrosion, or loose couplings.
Supply hoses are the most common failure point. Older rubber lines are especially vulnerable, and braided upgrades fail less often under pressure and age. The recommendation is replacement, not reuse, when visible wear exists.
Check the Drain Hose and Standpipe for Backup or Displacement
- Inspect the drain hose where it enters the standpipe.
- Confirm it is secured and inserted to the correct depth.
- Look for backing water, lint buildup, or a drain line that jumped out during discharge.
This is a frequent cause of flooding during spin or drain cycles. A secure drain line at both ends is standard loss prevention because discharge force can push an unsecured hose out of place.
Look for Overflow Triggers Inside the Washer
- Review the last load size and detergent amount.
- Check whether the unit sits level on the floor.
- Note any fill-valve issue, repeated overfill, or unusual tub behavior.
Service calls repeatedly tie overflow events to overloading, excess detergent, inlet valve failure, and out-of-level machines. Those root causes must be corrected before the unit returns to service.
Decide Whether the Issue Requires a Plumber or Appliance Technician
- Call a plumber for shutoff valves, supply lines, standpipes, drain backups, and supply piping.
- Call an appliance technician for inlet valves, pumps, internal seals, and control-related overflow.
- Use both trades if the source is not clearly isolated.
That division saves time-to-repair and reduces back-and-forth between contractors.
Step 6: Document the Damage and Decide When to Call Restoration Professionals
- Photograph the source and damage path.
- Record timing and actions taken.
- Escalate when hidden moisture is likely.
- Call licensed repair help if the leak source remains unresolved.
This final step drives claim clarity and restoration scope.
Photograph the Source, Water Path, and Damaged Materials
- Take close-ups of failed hoses, valves, fittings, and the washer connection points.
- Take wide shots of the full room and adjoining affected areas.
- Photograph serial and model labels on the machine.
This documentation helps prove sudden and accidental loss, which matters in insurance review.
Record Timing, Cleanup Actions, and Affected Materials
- Write down when the flood was discovered.
- Record when water was shut off, power was isolated, and drying began.
- List affected materials such as trim, drywall, flooring, rugs, cabinets, and ceilings below.
A simple timeline strengthens the handoff to adjusters, plumbers, and restoration crews. It also helps determine whether drying alone is sufficient or whether removal of wet materials is required.
Call a Restoration Company When Water Reached Hidden Cavities
- Call when baseboards are wet, drywall is soft, flooring is warped, or odor appears.
- Call when water reached adjacent rooms or a lower level.
- Call when surface drying finishes but moisture signs return.
This is especially true in Louisville homes with older finishes, plaster assemblies, finished basements, or historic framing details. Hidden moisture in those structures drives bigger losses if ignored.
Call a Plumber Immediately When the Leak Source Is Still Unresolved
- Call immediately if valves do not close fully.
- Call immediately if a hose, fitting, standpipe, or supply line still leaks.
- Do not restart the washer until the source is repaired and the area is dry.
That recommendation protects both property value and claim outcomes.
Common Mistakes That Increase Damage After a Washer Flood
Based on analysis of recurring water-loss patterns, four mistakes drive the highest repair bills: restarting too soon, ignoring hidden moisture, using temporary electrical workarounds, and delaying reporting.
Restarting the Washer Before the Source Is Confirmed
A test cycle without repair often creates a second loss event. It also weakens the claim story by blurring the line between sudden failure and preventable repeat damage.
Ignoring Water Under Flooring or Behind Baseboards
Surface dryness is not material dryness. Water trapped under flooring or trim continues to migrate, swell wood products, and feed odor and mold.
Using Extension Cords, Shop Lights, or Fans Unsafely
Emergency drying fails when it creates a second hazard. Wet areas and temporary cords do not mix. Powered equipment belongs only in electrically safe conditions.
Waiting Too Long to Report a Claim or Call for Drying
Delay reduces documentation quality and salvage rates. It also expands the restoration scope from extraction and drying to removal, rebuild, and possible mold remediation.
Troubleshooting: What the First Six Steps Look Like in Common Washer Flood Scenarios
The same six steps apply in every event, but the emphasis changes based on the cause.
If the Washer Overflowed During Fill
Focus first on stopping the cycle, then inspect detergent use, load size, leveling, and inlet valve behavior. Overflow during fill often points to internal machine issues rather than hose failure.
If a Hose Burst Behind the Machine
Treat this as a high-volume release. Main shutoff, breaker assessment, rapid extraction, and immediate hose replacement take priority.
If the Drain Backed up During Spin or Discharge
Focus on the standpipe, drain hose placement, and lint or debris blockage. In this scenario, the plumbing path is often the actual problem, not the tub.
If the Flood Happened While the Property Was Vacant
Assume hidden spread until proven otherwise. Longer dwell time raises odor, swelling, and mold risk, and strengthens the case for professional moisture mapping and insurance-ready documentation.
Prevention After Cleanup: Six Controls That Reduce Repeat Loss
Prevention has the best ROI in this category of loss. The recommendation is to install controls that shorten response time and remove common failure points.
Replace Rubber Hoses With Stainless Steel Braided Lines
Braided lines resist bulging, cracking, and burst failure better than aging rubber hoses. This is one of the strongest prevention upgrades after a laundry room flood.
Replace Washing Machine Hoses Every 3, 5 Years
Even hoses that look acceptable age from the inside. Service guidance consistently supports a 3 to 5 year replacement cycle.
Install a Leak Detector or Automatic Shutoff Device
Sensors and shutoff devices reduce loss size by catching water early. Travelers specifically recommends running the washer only when someone is home, and that same logic supports automatic alerting when no one is watching.
Keep the Washer Level and Avoid Overloading
A stable machine reduces vibration, movement, poor drainage, and internal stress. This simple correction prevents repeat service issues.
Secure and Inspect the Drain Line Regularly
A drain hose that is loose, kinked, or badly positioned can discharge directly onto the floor. Routine checks prevent that failure.
Avoid Running Laundry When the Property Is Unattended
This field-tested rule cuts total loss size more than almost any other habit. Water incidents become expensive when no one is present to stop them.
What the Expected Outcome Should Be in the First 24 Hours
A successful first-day response has six visible results: the water is stopped, electrical hazards are controlled, visible moisture is extracted, drying is underway, the cause is identified, and repair or restoration is scheduled where hidden moisture exists.
In claim terms, that is a defensible file. In property terms, it protects flooring, trim, walls, and lower-level spaces from unnecessary escalation.
Next Step: Restore the Space Fully Before Putting the Washer Back in Service
The final recommendation is direct: do not return the laundry room to normal use until materials are dry, the leak source is repaired, and no hidden moisture remains. In this kind of loss, fast shutdown limits the damage, but verified drying and proper repair protect the building, the budget, and the insurance outcome.

Read Our Reviews