
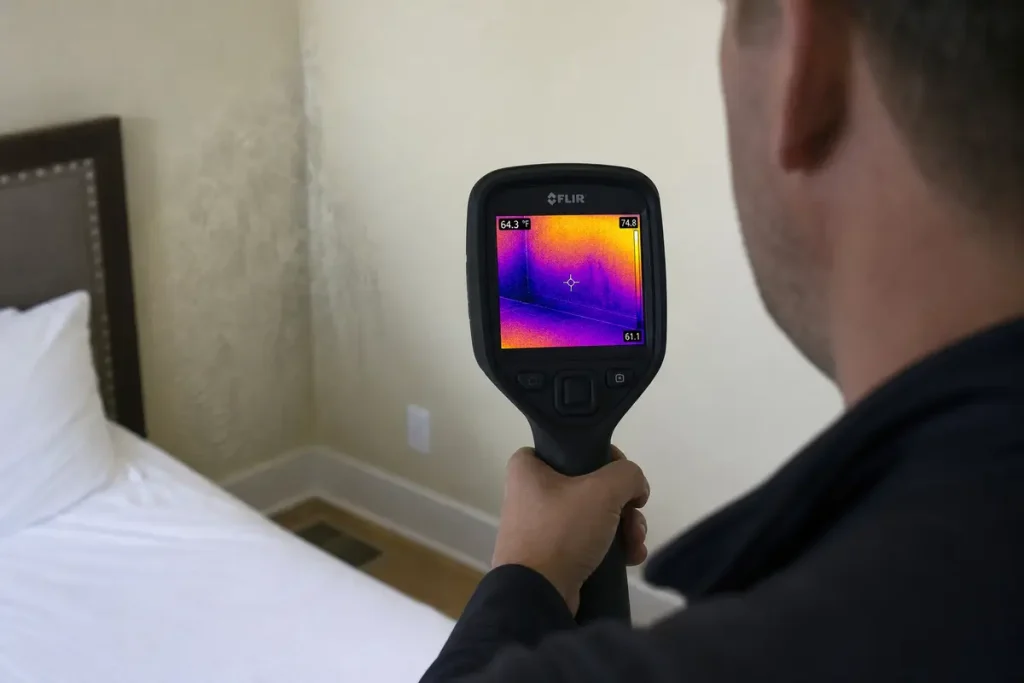
A water stain rarely tells the full story. Infrared moisture detection helps you spot where hidden wet has actually spread, before a small ceiling mark in Old Louisville turns into soaked insulation, damaged framing, and a messy insurance fight.
What Infrared Moisture Detection Actually Shows You
Infrared moisture detection shows temperature differences across building materials. That matters because wet drywall, plaster, wood, and insulation heat up and cool down differently than dry materials. On a thermal image, that difference stands out as a pattern.
Here’s the thing: the camera does not see water itself. It sees thermal behavior. A damp ceiling section often appears cooler than the surrounding dry area because evaporation pulls heat away. A saturated wall cavity can also show a distinct shape where moisture has spread along framing, seams, or gravity paths. That pattern gives you a fast map of where to inspect next.
That speed is the real advantage. Instead of guessing where the leak stopped, you get a visual guide that points you toward hidden wet behind surfaces and beyond the obvious stain.
What You’ll Need Before the Inspection Starts
A good scan starts before the camera turns on. If the tools are wrong or the conditions are sloppy, the images get noisy and the conclusions get weak. That is exactly how people miss wet drywall, trust a false alarm, or document a claim badly.
Thermal Camera With Enough Resolution for Building Materials
A low-resolution camera can blur subtle temperature changes into a vague smudge. That is not good enough when you are scanning plaster walls, textured ceilings, subfloors, or older wall assemblies with uneven surfaces.
A clearer image helps you separate a true moisture pattern from ordinary temperature variation. You want to see the edges of the anomaly, the way it follows a seam, and whether it tracks downward, outward, or along a framing line. In practical terms, higher image quality means fewer bad calls.
Moisture Meter to Confirm the Wet Areas
Infrared gives you the map. A moisture meter gives you the proof.
A pinless meter reads moisture conditions below the surface without leaving holes, which makes it useful for checking larger areas quickly. A pin meter uses two small probes to test material directly, which helps when you need a more exact comparison in wood trim, framing, or stubborn spots. If you want a cleaner breakdown of how different meter styles work in the field, it helps to review that before the inspection.
Flashlight, Inspection Notes, and Photos
The simple tools still matter. A flashlight helps you catch bubbling paint, lifted flooring edges, rusted fasteners, warped trim, and faint staining that disappears in poor light.
You also need photos and notes from the start. Thermal images mean more when you can match them to a standard photo and a written note that says “north bedroom ceiling near chimney” or “basement wall behind water heater.” Clean records make repair decisions faster and insurance conversations less chaotic.
Access to the Affected Rooms and Nearby Building Areas
Hidden wet travels. That means you need access not just to the stained room, but also the closet next to it, the bathroom above it, the utility room behind it, the basement below it, and the attic overhead if the layout demands it.
A leak under a second-floor vanity can show up as damage in a first-floor hallway ceiling. A roof leak can move across rafters before it drops. If you only inspect the obvious room, you inspect half the problem.
Stable Indoor Conditions Before Scanning
Stable conditions make the scan trustworthy. Open windows, blasting HVAC, direct sun on an exterior wall, recent mopping, hot showers, and active cooking all distort thermal patterns.
You want the building to settle down before scanning. Closed windows, normal indoor conditions, and enough time after weather or cleaning activity give you a cleaner picture of what is actually wet.
Step 1: Start With the Story of the Loss
Before you scan anything, get the loss story straight. A good inspection starts with timing, source, and spread pattern, not with random camera sweeps.
- Note when the problem was first noticed.
- Record what changed, such as a new stain, odor, sag, or flooring movement.
- Identify the likely event, such as heavy rain, a burst line, a sewage backup, an appliance overflow, storm entry, or firefighting water.
- Mark the first room where damage showed up.
- Mark any rooms where damage appeared later.
That timeline tells you where to start and what path the water probably took.
Ask When the Problem Started and What Changed
Timing connects building damage to a real event. If a ceiling stain appeared right after a hard Louisville rain, start at the roof line, flashing, attic path, and top-floor ceiling assembly. If a musty odor showed up after a basement seepage event, shift attention to lower wall cavities, trim, stored contents, and slab-edge areas.
Write down simple facts. “Basement smelled damp Sunday morning after storms.” “Kitchen floor cupped after dishwasher line failed overnight.” “Bedroom ceiling stain expanded after Tuesday rain.” Those details keep the inspection focused.
Identify the Source Category Before You Scan
Not all water losses get handled the same way. Clean water from a supply line is different from gray water from an appliance discharge. Black water from sewage demands a much more controlled response. Fire losses add another layer because extinguishing water often combines with soot, residue, and damaged materials.
This step matters because the inspection is not just about finding wet areas. It is about matching the findings to the right restoration plan and safety response.
Step 2: Walk the Space and Look for Visible Clues First
The building usually gives you a head start. Before the thermal camera comes out, walk the space and notice the obvious signs.
- Enter the affected room slowly and scan from ceiling to floor.
- Check corners, outside walls, and areas around fixtures.
- Look inside closets, behind doors, and along baseboards.
- Step into adjacent rooms and compare conditions.
- Note any pattern that lines up with plumbing, roofing, or exterior exposure.
This walkthrough gives the thermal scan context, which is exactly what prevents shallow mistakes.
Check Walls, Ceilings, Floors, and Trim for Obvious Damage
Visible clues include staining, peeling paint, sagging drywall, soft wall surfaces, swollen baseboards, cupped wood flooring, delaminated vinyl plank, and rust at metal fasteners or corner bead. Those signs tell you where damage surfaced.
But visible damage is often just the edge. If you are dealing with warning signs inside closed wall cavities, the stain you can see is often smaller than the wet area hiding behind it.
Pay Attention to Odor, Humidity, and Room Feel
A room with hidden moisture often feels off before it looks dramatic. You notice stale, damp air. A wall section feels cooler. A basement room feels sticky even when the rest of the house feels normal.
That matters because your senses narrow the search before you ever raise the camera. A musty smell near a finished lower-level wall in the South End often points to concealed moisture spread, not just an old odor that means nothing.
Expand the Walkthrough Beyond the Stain
Water spreads the way spilled coffee spreads across a counter. It follows seams, dips, edges, and gravity. It gets under trim, behind cabinets, across joists, and into the next room.
So expand the walkthrough. Check above, below, and to both sides of the stain. A stain is a clue, not a boundary.
Step 3: Set the Right Conditions for Infrared Moisture Detection
https://www.youtube.com/watch?v=2DUcteBbucM
This is where a rushed inspection goes wrong. Good infrared moisture detection depends on conditions that make wet materials stand out from dry ones.
- Close exterior doors and windows.
- Let indoor air stabilize.
- Shut down unusual heat sources in the area if possible.
- Note weather, sun exposure, and recent water use.
- Avoid scanning immediately after surface cleaning or steam-heavy activity.
The goal is simple: reduce noise so the moisture pattern becomes easier to read.
Reduce False Readings From Sunlight and Heat Sources
Sunlight can heat an exterior wall unevenly. Supply vents can cool a section of drywall and make it look suspicious. Recessed lights, appliances, electronics, and hot pipes can all create thermal patterns that have nothing to do with moisture.
Avoid scanning sun-loaded walls at the wrong time of day. Watch out for vent discharge, heat-producing fixtures, and mechanical equipment nearby. A dramatic image means nothing if the cause is a can light, not a leak.
Use Temperature Differences to Your Advantage
Wet materials respond differently to temperature changes. That is why the camera works at all. If indoor and outdoor conditions create a useful contrast, the spread pattern becomes easier to see.
This is why finding hidden wet with a thermal camera works best when the building has settled into stable conditions instead of swinging from direct sun, open windows, or recent heavy HVAC cycling.
Note Weather and Recent Building Activity
Write down recent rain, active leaks, showers, laundry, cooking, mopping, and HVAC changes. Those notes explain the context behind the image.
Later, if you need to explain why a second scan was cleaner than the first, those details matter. Good notes save you from arguing over a blurry memory.
Step 4: Scan the Suspected Area With the Thermal Camera
Now scan the loss the way an inspector should, room by room and surface by surface.
- Start in the room where damage was first noticed.
- Scan the full ceiling, wall, or floor from a few steps back.
- Move closer once a pattern appears.
- Follow the pattern outward along likely travel paths.
- Continue into adjacent rooms and opposite sides of the same assembly.
- Save thermal images and standard photos as you go.
The trick is not to wave the camera around and hope for the best. Move with purpose.
Start Wide, Then Move in Tight
Start with the whole wall or whole ceiling. That wide view shows the full shape of the anomaly. Once you spot a suspicious area, move in closer to define edges and track the path.
If you start too tight, you miss the spread. You end up chasing the darkest patch on the screen instead of understanding the actual wet boundary.
Follow Framing, Seams, and Gravity Paths
Moisture tracks along studs, joists, insulation gaps, window headers, pipe chases, and floor transitions. Read the shape, not just the color. A straight vertical line may point to framing influence. A wide downward bloom often shows gravity spread. An irregular cool patch under a window can point to intrusion at the opening.
Pattern recognition is what separates a useful scan from a pretty picture.
Scan Adjoining Rooms and the Opposite Side of the Surface
Always check the neighboring spaces. A bathroom leak can show in a hallway wall. A roof leak can run across framing and appear feet away from the entry point. A wet kitchen ceiling may tie back to a second-floor laundry line, not the plumbing fixture directly above.
This is also where you uncover the kind of hidden moisture that keeps spreading out of sight. The visible room is often just the middle of the story.
Capture Thermal Images and Matching Standard Photos
Every thermal image needs a matching visible-light photo. Pairing them makes the findings understandable to contractors, adjusters, tenants, and property owners.
Label images by room and surface while the inspection is happening. Waiting until later creates confusion, and confusion kills clean documentation.
Step 5: Verify the Thermal Anomaly With Moisture Meters
A thermal anomaly is a lead, not a verdict. This step turns suspicion into evidence.
- Check the suspicious area with a pinless meter first.
- Compare readings across the visible boundary.
- Test a known dry area nearby.
- Use a pin meter where deeper confirmation is needed.
- Record the readings with location notes.
This checkpoint matters because air leaks, cold pipes, and surface temperature shifts can mimic moisture on camera.
Use a Pinless Meter for Fast Surface-area Confirmation
A pinless meter is ideal for scanning broad areas of drywall, wood, or masonry without punching holes. Sweep across the suspected boundary and watch where readings rise and fall.
That helps you outline the wet zone quickly. If you want a closer look at why non-invasive meters read below the surface, the operating principle is straightforward once you see it in practice.
Use a Pin Meter When You Need Deeper Confirmation
A pin meter makes sense when you need a direct reading in wood trim, framing, or a stubborn area where the pinless result needs backup. It is also useful when you want side-by-side comparison between suspect material and dry material nearby.
A relative reading is simple: compare one area to another. If baseboard under the leak reads far higher than matching trim across the room, that tells you plenty.
Compare Suspicious Areas to Known Dry Materials Nearby
Baseline matters. Test a dry closet wall, a far end of the hallway, or an unaffected section of the same room. Without that comparison, a number has less meaning.
Dry-to-wet comparison keeps your conclusion grounded in the building you are inspecting, not in guesswork.
Step 6: Map the Full Extent of Hidden Wet
Once you have the thermal pattern and the meter confirmation, turn scattered findings into a clear map.
- Mark confirmed wet boundaries on notes or photos.
- Separate visibly damaged material from hidden spread.
- Identify affected finishes, structural materials, and contents.
- Mark where drying can stop and where removal needs to start.
- Note any contamination category tied to the loss.
This is the point where inspection becomes action.
Mark Affected Materials and Moisture Boundaries
Outline wet drywall, trim, flooring, insulation zones, ceiling sections, and any adjoining areas with elevated readings. A clear boundary gives you a drying or demolition scope that makes sense.
Without that map, repairs drift. Crews remove too little, or too much.
Separate Primary Damage From Secondary Spread
Primary damage is the source area. Secondary spread is where water traveled afterward. That difference matters because the source room is not always the largest repair area.
A failed supply line under a sink is the primary event. Wet flooring in the next room, swollen base trim down the hall, and damp drywall below are secondary spread. Keep those areas distinct in your records.
Document Category, Class, and Affected Contents
Record the water category, the general extent of wet materials, and what contents got hit. That includes cabinet toe-kicks, furniture legs, stored boxes, tenant property, rugs, and lower shelving.
The more exact the record, the smoother the next step. That is especially true if you are comparing repair scope to what usually drives the price of a documented inspection.
Step 7: Decide What Happens Next Based on What the Scan Confirms
Once the inspection confirms the spread, choose the next move. Waiting just gives moisture more time to damage the structure and fuel mold growth.
- Dry salvageable materials immediately.
- Open trapped assemblies where drying will not reach.
- Escalate contaminated losses fast.
- Schedule follow-up checks to confirm progress.
A clean decision here saves time and money.
Dry in Place When Materials Are Salvageable
If the loss is recent, the water is clean, and the materials remain restorable, dry in place. That usually means airflow, dehumidification, and controlled drying of the confirmed wet zone.
Fast action pays off. So does keeping the drying boundary based on evidence, not guesswork.
Open Materials When Moisture Is Trapped
If moisture is trapped behind walls, above ceilings, inside insulation, or under layered flooring, open the assembly selectively. Trapped moisture does not fix itself.
This matters even more if the loss sat for days. That is how moisture turns into odor, staining, material breakdown, and fast-moving fungal growth after a leak.
Escalate Immediately for Sewage, Storm Contamination, or Fire-related Losses
Sewage backup, storm-driven contamination, and post-fire moisture demand direct action. Those losses involve contamination, residue, and higher health risk. The inspection still matters, but the response needs to move faster and with tighter controls.
Do not treat those losses like a small clean-water supply leak. They are not the same job.
Step 8: Prepare Records for Contractors, Tenants, or Insurance
A good inspection ends with records that make the next conversation easier.
- Sort images and notes by room.
- Match thermal images to visible photos.
- Log moisture meter readings with location details.
- Write a short scope of affected materials.
- Keep a simple timeline of what happened and what was done next.
That package becomes your handoff document.
Organize Thermal Images, Meter Readings, and Room Notes
Label files clearly: “hall bath east wall,” “living room ceiling below tub,” “basement north wall near panel.” Add the date and the surface tested. Keep meter readings tied to each location.
Short notes beat long rambling ones. You want records that make sense three weeks later.
Write a Simple Scope of Affected Areas
Summarize what is wet, where it extends, and what needs drying, cleaning, or removal. Keep it plain. “Elevated moisture in hallway ceiling extending 4 feet beyond visible stain.” “Base trim and lower drywall in utility room confirmed wet.” That is enough to move work forward.
Keep a Timeline of Loss, Mitigation, and Follow-up Checks
Track when the leak started, when the inspection happened, when drying began, and when follow-up checks confirmed progress. That timeline supports claim review, contractor scheduling, and tenant communication.
It also keeps the whole project from turning into a memory contest.
Common Problems That Can Fool an Infrared Scan
Infrared is powerful, but it is not magic. Some patterns look dramatic and still have nothing to do with moisture.
HVAC Vents, Cold Pipes, and Air Leaks
Moving air creates strong temperature changes. A supply vent, a wall cavity draft, or an uninsulated cold pipe can look like a moisture trail on camera.
This is exactly why meter confirmation matters. If the thermal image looks suspicious but the moisture readings stay normal, you keep digging instead of calling it wet.
Sunlight, Exterior Walls, and Recent Weather Swings
Exterior walls and upper-story rooms react fast to sun, shade, wind, and temperature swings. A hot afternoon can leave a wall loaded with heat long after the sun moves off it. A cool overnight rain can shift surface temperatures in odd ways.
Timing fixes a lot of this. Scan when conditions are stable, not chaotic.
Reflective Surfaces and Glossy Finishes
Tile, mirrors, metal, glossy paint, and shiny fixtures can distort what the camera seems to show. You are not always seeing the surface itself. Sometimes you are seeing reflected thermal energy from somewhere else in the room.
Change your angle, rescan, and verify with the meter.
Old Stains That Are Dry Now
An old brown stain does not prove active moisture. Plenty of older Louisville homes carry the history of past roof leaks, chimney flashing failures, or long-fixed plumbing issues.
Active moisture shows a fresh thermal anomaly plus elevated meter readings. An old dry stain gives you discoloration without confirmation.
Troubleshooting: What to Do If the Findings Are Unclear
Sometimes the first scan is messy. That does not end the inspection. It just means you tighten the process.
Re-scan After Conditions Stabilize
If HVAC just kicked on, windows were open, surfaces were recently cleaned, or weather changed fast, wait and scan again. Stable indoor conditions often make the real pattern stand out.
A second pass under better conditions is often the difference between a vague suspicion and a usable answer.
Expand the Inspection Area
If the source does not make sense, expand outward. Check farther upstream and farther downstream. Look above the stain, behind the room, and one space over.
The source is often not where the damage first caught your eye.
Add Invasive Confirmation Only When Necessary
When thermal images and meter readings still leave uncertainty, move to targeted invasive checks. A small inspection opening, a borescope view, or limited material removal gives you direct confirmation without random demolition.
If you need to see inside a cavity before opening more, using a small inspection camera through a controlled access point is often the smartest next step.
What You Should Expect After Infrared Moisture Detection
By the end of the inspection, you should have a clear picture of where hidden wet sits, which materials are affected, how far the spread goes, and what the next drying or repair step looks like. You should not be left staring at one stain and guessing.
That clarity is the whole point. Infrared moisture detection turns a vague problem into a defined one, which makes decisions faster, claims cleaner, and repairs more targeted.
Your Next Move This Week
Pick one suspicious area this week, a stained ceiling, a musty basement wall, or a warped floor edge, and get it checked with a documented moisture inspection before the damage spreads. Fast confirmation leads to faster drying, cleaner records, and a lot fewer ugly surprises.
Need Professional Help?
Don’t risk further damage to your property. Bear Restoration‘s IICRC-certified team is available 24/7 for emergency restoration in Louisville, KY and surrounding areas.

Read Our Reviews